
Microsoft Excel often tries to automatically interpret and convert what you type into the most “appropriate” format.
For example, if you enter these kinds of values:
| Input | What Excel may convert it into |
|---|---|
| 2024-01 | January 2024 |
| 01-05 | January 5 |
| 1/2 | January 2 |
| 20240101 | 2024/1/1 (depending on settings) |
This automatic conversion can be convenient — but in many cases it causes problems, especially when you want to work with codes, IDs, fixed-format text, or strings containing hyphens and you don’t want Excel to interpret it as a date.
Why Does Excel Convert Text to Dates?
Excel has a built-in feature that automatically analyzes what you type and tries to convert it to a number, date, or other format it thinks is appropriate.
This means certain patterns — particularly ones that resemble dates — may get turned into actual date values without warning.
Best Ways to Prevent or Fix Unwanted Date Conversion
Here are several practical ways to control or stop Excel’s automatic date conversion:
✅ Method 1: Pre-Format Cells as “Text” (Most Reliable)
Before typing anything:
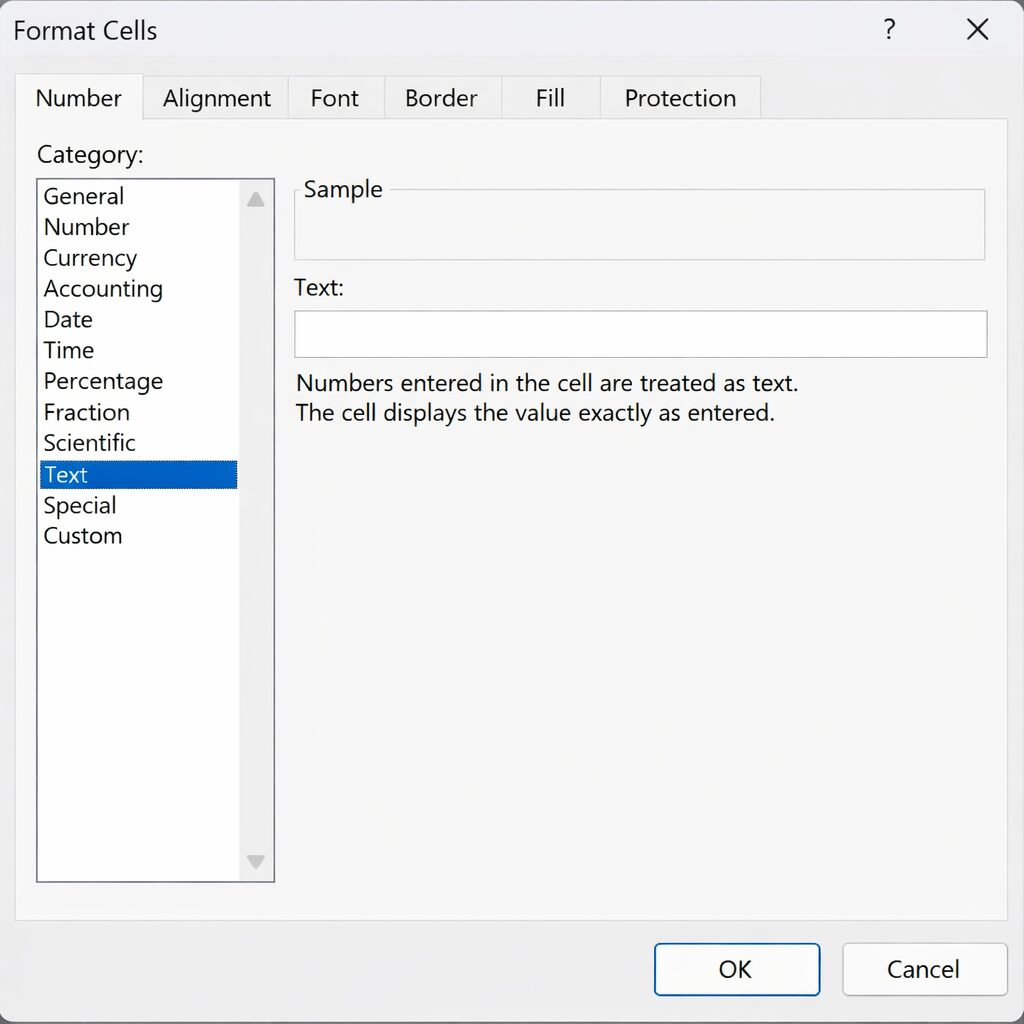
- Select the cells where you’ll enter data.
- Go to Home → Number Format → Text.
- Enter your data.
➡️ Because the cells are formatted as text, Excel won’t convert patterns into dates.
This is the most stable and recommended solution.
Note: This only works before data is entered.
If dates have already been converted, use one of the next methods.
✅ Method 2: Prefix with a Single Quote (')
Simply type a single quote (') before your text, e.g.:
'2024-01Excel interprets this as a text entry, not a date, and displays it exactly as typed (the ' does not appear in the cell).
This works quickly even if you’re entering data into many cells.
✅ Method 3: Change Cell Format After Conversion
If Excel has already converted text into dates:
- Select the cells that were converted.
- Press Ctrl + 1 to open Format Cells.
- Choose Custom and enter your desired format.
Examples:
yyyy-mm or
0000-00This displays the content in the format you want — even if Excel already treated it as a date.
✅ Method 4: Use “Get Data → From Text/CSV” When Importing
When importing CSV or external files, Excel often converts fields with hyphens into dates.
Instead of opening the CSV directly:
- Go to Data → Get Data → From Text/CSV.
- In the import wizard, set the relevant columns to Text before loading.
This prevents unwanted date conversion during import.
✅ Method 5: Use “Text to Columns” (Older Excel)
If you have a column that’s already partially converted:
- Select the column.
- Go to Data → Text to Columns.
- Proceed without specifying delimiters.
- Set the column format to Text.
This forces Excel to treat the entered strings as text.
Summary: When to Use Each Method
| Situation | Recommended Solution |
|---|---|
| You want to prevent conversion before typing | Method 1 (Text formatting) |
| You need a quick stop while typing | Method 2 (Single quote ‘) |
| Conversion already happened | Method 3 (Custom formatting) |
| Importing CSV data | Method 4 (Get Data …) |
| Older Excel workflow | Method 5 (Text to Columns) |
Final Notes
Excel’s automatic conversion is powerful but can be a headache when it changes your text unintentionally.
By applying the methods above, you can control when Excel treats input as text or date, and avoid unexpected behavior during data entry or processing.
")

